Installing A Printer
1)Left-Click the ^ Icon located on the task bar just left of the date/time area.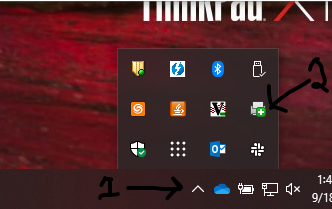
2)Left-Click the icon that looks like a printer with a green + sign.
3)An internet browser will open. If you need to enable the extension, please check out the “Enable PrintLogic Extension” section.
4)On the left-hand side of the browser, there is list of locations. Left-Click the location of the printer you want to install.
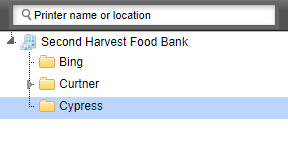
5)A map will appear with printer icons placed on it. The icons are placed in the same place as their physical location.
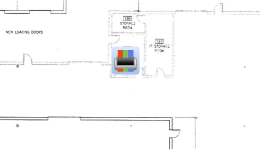
6)When you hover over a printer icon, a box will appear with basic printer info. To install the printer, left-click the “Install Printer” button at the top of the new box.
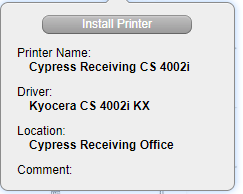
7)A dialog box will appear asking you if you want to install the printer. Left-Click Yes to install. To make the printer your default printer, left-click the check box next to “Set as default printer”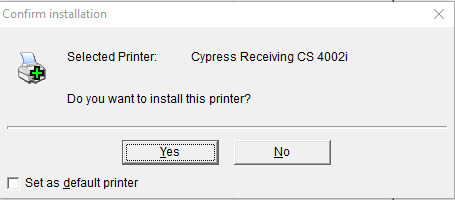
8)Once you left-click the Yes button, another dialog box will appear to show installation progress.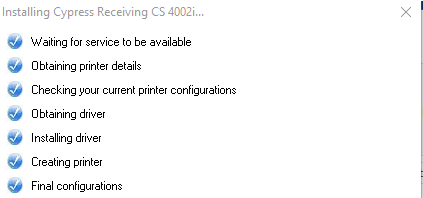
9)Once the printer is finished installing, a new dialog box will appear saying the printer has been installed successfully. Left-click the OK button and you are now finished.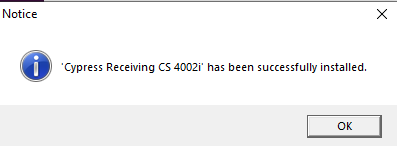
Enable Add-in (Chrome):
1)When first using PrinterLogic you may need to enable the Chrome Extension. This dialog box appears if you need to. Left-Click the install button.
2)Another browser window will appear. Left-Click the “Install Extension” button.
3)A new webpage will open. Left-Click “Enable this item.”
4)You will now be able to navigate the PrinterLogic web page now.
Comments
0 comments
Article is closed for comments.